
Beginning of work
Log in to the cash register is performed through authorization on the Microsoft page through corporate account with the end
@ sushi-master.net provided by your supervisor.
Login to the system
-
Enter your username and click next
-
Enter your password and click sign in
-
To ensure that the system does not constantly require confirmation from you, click the "Do not show again" checkbox and confirm the entry with the Yes button

Lock in and out
Click on the arrow in the upper right corner and select one of the following from the drop-down menu:
Log out - Exit from the cash register to the start screen
Lock - Lock cash place
Minimize - Minimize the window
Quit - log out
Home screen elements
Network connection indicator
If there is no network connection, the indicator will be highlighted in red
Application version
The current version number of the application will be displayed in numbers to the right of this badge
Homepage
Button opening window with consolidated information as of the current state at this cash register point
Posts
Button that opens a message window, coming from the center
Create a new order
Button that opens a window for creating new orders
Operations
The button opens a window with a list of all created orders and the statuses in which they are located
Shift report
The button opens a window with a report on the turnover at the cash register in the context of shifts
Settings
The button opens a window in which you can switch between tabs in order to make the settings required for work with a cash register, updates application and service operations
Screen keyboard
The button opens the on-screen keyboard for data entry
Create order

Adding dishes to a new order
To add dishes to a new order, click on the new order button. The order window will open, it consists of two main elements:
Left - order field
On the right is a menu of dishes available for adding to an order.
To add a dish to the order, click on the dish icon from the menu, it will appear in the order field.
To return to the selection of food categories, simply click on the word Category
Button panel for working with an order
Order cancellation
Adding a comment to the order
Entering readiness and delivery times order
Entering a promo code and discounts
Choosing the type of delivery
Recalculation of the order
Saving an accepted order
Search for a dish

Dish search bar
Here you can find dishes by name to add to the current order.

Increasing and decreasing the number of dishes in the order
By clicking on the + in the order field, you can increase the number of dishes by clicking on - decrease, or enter the quantity manually in the input field

Quick access menu
It allows you to add the most used items to the order without wasting time searching. To add dishes to the quick access menu, you need to go to the settings, then to the Quick list tab, there you can add or remove dishes from your favorites

Deleting a created order
The cart icon button removes all dishes from the order

Create a comment
A button with a message icon allows you to leave a comment on the order

Application of promo codes and discounts
The button for applying the promotional code is located at the bottom, by clicking on it, you will open an input field, where you must enter the promotional code itself or the name of the discount, then confirm the actions by clicking the Save button. Next, click on the green button with a round arrow to update the data in the order, you will see that the total amount has changed, as well as sticks and soy sauce by the number of persons have been added

Temporary orders
To set the order delivery time, or assign it a "temporary" sign, you need to click on the button with the alarm clock.
A window with fields for input and a checkbox will appear:
Readlness time - field with order readiness time
Order delivery time - with the order delivery time.
To set a temporary order sign, you need to check the Time Mark checkbox - a temporary order mark.
To complete the operation, click in the space around the window with the entered data

Change of payment type
To change the type of payment, click on the button with the wallet icon, a window will appear with the amount input field and the Payment Methond button - the type of payment. By clicking on the button to change the type of payment, you can choose one of the options:
Balance Card - payment by credit card
Mixed - mixed type of payment, for example, the first part of the order will be paid in cash, the second part by card
Cash - cash payment

Editing an existing order
To change an existing order - click on the button with a pencil drawing a line

Placing an order in a problem
To set the order as a "problem" attribute, you need to click on the button with a bell, a window will appear with a list of possible problems, you must indicate the most suitable for your case and save the changes

Transferring the order to the status "in preparation"
After completing the creation of the order, it is necessary to send it to the kitchen, to do this, click on the green button with the package, then the order should appear on the kitchen screen and the guest will receive information about the current status of the order
Working with orders

Screen with orders
To start working with orders, you need to open a window with orders, on the screen the button to go to the window with orders is displayed as pressed. On the screen with orders, there are columns divided by status:
New
Prepare
Ready
On my way
Delivered
Additional screen with orders
There is also an additional screen with orders, to access it you need to click on the button with the ellipsis, here are the orders with statuses:
Closed
Canceled
Unconfirmed


Screen with orders
To start working with orders, you need to open a window with orders, on the screen the button to go to the window with orders is displayed as pressed. On the screen with orders, there are columns divided by status:
New
Prepare
Ready
On my way
Delivered

Transferring orders to another outlet
Go to the Order list window.
Select the orders you want to redirect to another restaurant by checking the boxes next to the order number.
Click on on the store icon, and in the window that opens, select the restaurant to which the selected orders will be redirected.
Click on Select to redirect orders to the selected restaurant. A confirmation window will open.
In the window that opens, the name of the store and the number of orders that will be redirected to the selected store are indicated. Click Yes to confirm the action.
As a result of the actions performed, orders will be redirected to another restaurant and will not be displayed in the Order list window.
IMPORTANT!
Orders can be redirected to another restaurant, only in the New status (New).
If, when redirecting to another restaurant, an order with a different status is selected, a window will open with a warning that such orders cannot be redirected, and the number of orders that cannot be changed is indicated.
Stop list

Setting up a stop list
Items are added to the Stop list if there are no positions or resources for their preparation at the outlet.
Items in the stop list in the catalog are displayed with gray highlight. After being removed from the list such positions are highlighted again.
Adding a dish to the stop list
Click on the button and go to the " Stop list " tab.
Select the " Category " category and click on it once.
From the list of titles, select the ones you want to add to the stop list clicking on them one time
Note: To return to the general list of categories, click on the word "Category" located below the search by position bar. The selected items will be displayed to the left of the list of all products. To remove a position from the stop list click next to the name (fig. 17).
Important
Products can be added to the Stop list both at the checkout point itself and in the center. At the same time, if a position was added to the Stop list in the center, then it is impossible to remove an item from this list at the point of sale. If the position was added to the Stop list locally, then such a position can be removed from this list,
as soon as it becomes available for sale.
Cash discipline

Screen with orders
To start working with orders, you need to open a window with orders, on the screen the button to go to the window with orders is displayed as pressed. On the screen with orders, there are columns divided by status:
New
Prepare
Ready
On my way
Delivered
Screen with orders
To start working with orders, you need to open a window with orders, on the screen the button to go to the window with orders is displayed as pressed. On the screen with orders, there are columns divided by status:
New
Prepare
Ready
On my way
Delivered

X report
This is a daily PPO report without resetting the cash register memory information, which makes it possible to monitor and verify the available amount of money in the PPO with the transactions performed.
To perform the operation:
On the "Reports" tab, click on the "X report" button.
In the window that opens, click the button to print the report.

Z report
It is used to display the results of the cash register shift received at the PPO during the day.
To perform the operation:
one. On the "Reports" tab, click on the "Z report" button
2. In the window that opens, click the button to print the report.
IMPORTANT! The time between the opening and closing of a cash register shift cannot be more than 24 hours.
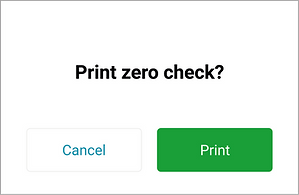
Zero check
An operation that is performed at the beginning of the working day to check the legibility of printing and the correctness of the details in the check. The successful completion of this operation shows the efficiency and readiness for the operation of the fiscal registrar.
To perform the operation:
On the "Reports" tab, click on the "Zero check" button
In the window that opens, click on the button to print a zero receipt.

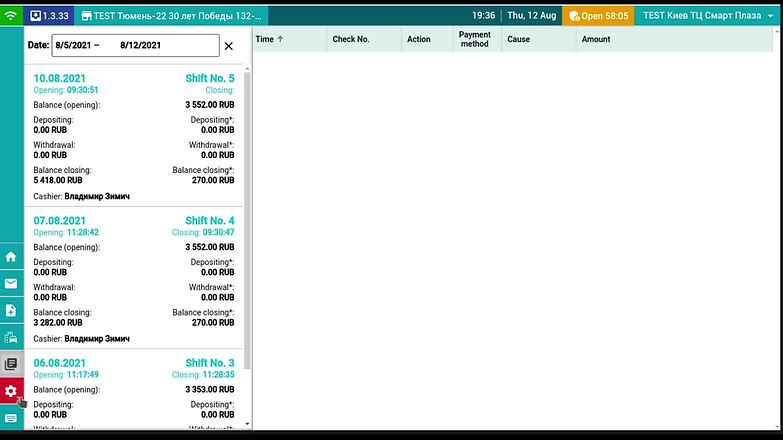
Report for the period
This report is designed to print data for a selected period of time.
To perform the operation:
Click on the "Report for a period" button
In the opened window select the start date ("Date from") and the end date ("Date to") of the period from the drop-down calendar.
Click Print to print the report.
Working with orders
The "service deposit" operation is used to register the amount of cash, which is stored at the place of settlement at the time of registration of the first settlement operation, which is carried out after the execution of the Z-report.

Screen with orders
To start working with orders, you need to open a window with orders, on the screen the button to go to the window with orders is displayed as pressed. On the screen with orders, there are columns divided by status:
New
Prepare
Ready
On my way
Delivered
Operations "service take-out" are performed according to requests, which are coordinated using the K2 process and arrive at the point of sale in the form of a list of requests. When new applications arrive, the icon changes to indicating the number of applications received. Also, the presence of orders is indicated by the number next to the name of the “Operations” tab and on the button “- $ Withdrawal”.
The data in the fields "Description" , "Current Cash Balance" and "Cash / Cash *" are pulled from the already created order to K2 and are not available for editing.

Screen with orders
To start working with orders, you need to open a window with orders, on the screen the button to go to the window with orders is displayed as pressed. On the screen with orders, there are columns divided by status:
New
Prepare
Ready
On my way
Delivered